One of the aspects of solar system installation where proper analysis and planning is needed is the mounting of the solar panels or array. This is because the solar panels collect the solar energy in form of DC which is converted to the appropriate form (usually AC, except for DC appliances) by the inverter for powering your appliances. So proper planning is done so as to choose the best solar panel mounting location and orientation that will yield optimum solar energy. In this article, you will learn the various factors to consider before choosing solar panels mounting location, possible locations to mount your solar array and how to mount your solar arrays in both roof tops and standalone structures.

Factors to Consider before Mounting your Solar Panels
For solar panels to perform optimally, they need to be positioned perpendicular to the sun. This is because polar panels produce energy primarily from sun light striking perpendicular to the array surface. Ensuring that your panels always face perpendicular to the sun is very difficult since the sun rotates throughout the day. But there are some key factors you need to consider, which will influence the performance of your solar arrays.
Probability of Shading
Shades on solar panels (both partial and full) reduce their total power output. Therefore shading must be considered in the design process of solar PV systems and the probability of shading occurring on any or some of the panels should be reduced to the possible minimum.
There are mainly 2 types of shading: External shading and Self-induced shading.
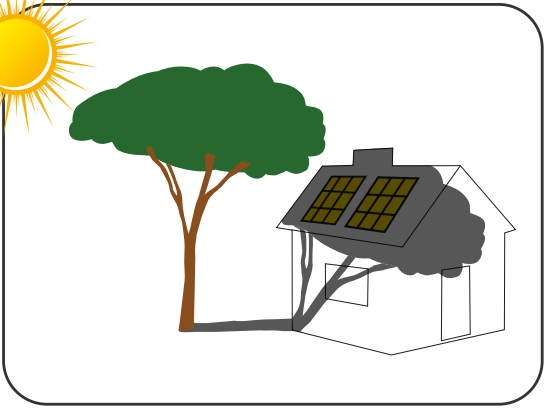
External shading is caused by obstacles external to the building, such as trees, adjacent buildings, mountains, snow, power lines, etc. This type of shading can be accurately measured and assessed with site solar photography and proper solar system modelling.
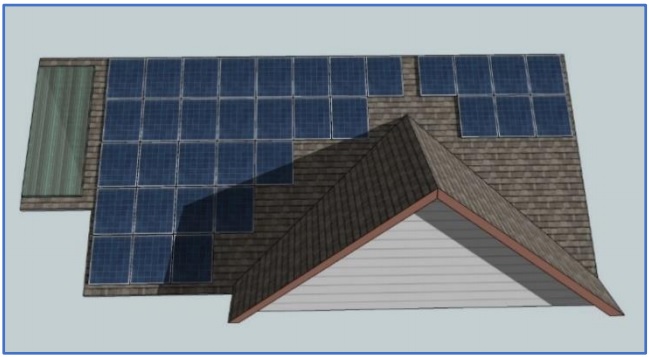
Self-induced shading is caused by features of the building such as the dormer and gables, satellite dishes, plumbing stacks, roof vents, etc. This type of shading can easily be accessed with 3D modelling. It can be eliminated by careful choice of designs during construction stage.
Also note that the choice of inverter technology can help mitigate both types of shading.
Mounting Orientation
The best possible orientation in the southern hemisphere is due North. If you wish to mount the PV panels on vertical walls, the best orientation is between North-East and North-West. Tilting the panels gives a wider range of orientation that will give reasonable energy yield.
Tilt Angle
Tilting your solar array will expose it to more sunlight than when mounted vertically. The best angle range for tilting your arrays is between vertical and 15o off horizontal. For rain to help wash off dusts from your solar panels, tilt at a minimum of 15o to the horizontal. If your panels are facing north, then tilt them between 30o to 60o. Generally, you can mount your solar arrays at a tilt angle approximately equal to the latitude of your home or area for optimal annual energy production.
Check:
- Pros, Cons & Uses of Solar PV Energy Technology
- Different Solar Inverter Technologies for Grid & Off-Grid Connections
Possible Solar Arrays Mounting Locations
House Roofs
Main house roofs are one of the most recommended locations for mounting solar arrays. Ensure there are no external structures that are tall enough to shade the solar arrays when mounted on your house rooftops. Tall trees planted within the house premises usually cause this type of shading.
Adjacent Structures or Standalone Structures
The rooftop of any building or structure adjacent to your main house could also provide nice surfaces for mounting your PV panels, especially if the main house will not shade the rooftop where you intend to mount the solar panels.
You can also construct a high standalone structure on the adjacent side of the main building specially for mounting your solar panels.

Walls or Railings
You can also mount your solar panels on south-facing walls or railing, where they will not be shaded. To reduce the potential for damage or shading, especially in winter months, make sure the walls or railings are high.

On the Ground
There are special structures you can use to mount your solar panels very close to the ground. This option becomes the best alternative if you have enough space in front or adjacent to your house, where the main build will not shade the panels, and there are no other external shading source around the area. You can face the panels due south or adjust them for optimum electricity generation.
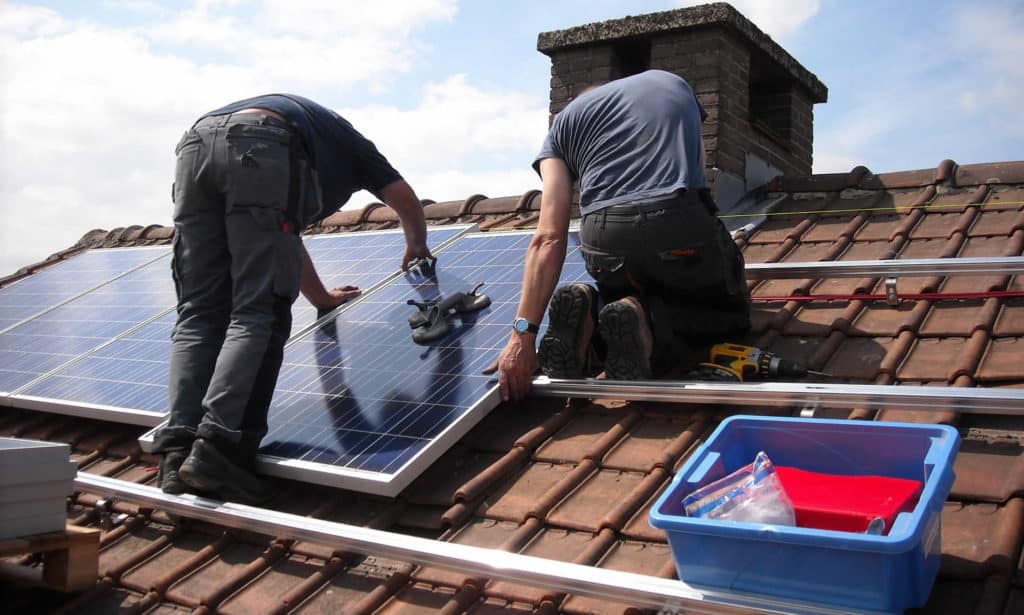
Step by Step Guide on How to Install Solar Arrays on Rooftops
Before mounting solar panels on roof tops, make sure that your roof pans are not old, and will not be due for replacement in the next 10 to 20 years. If not, replace the roof pans or you look for another location to mount your solar arrays.
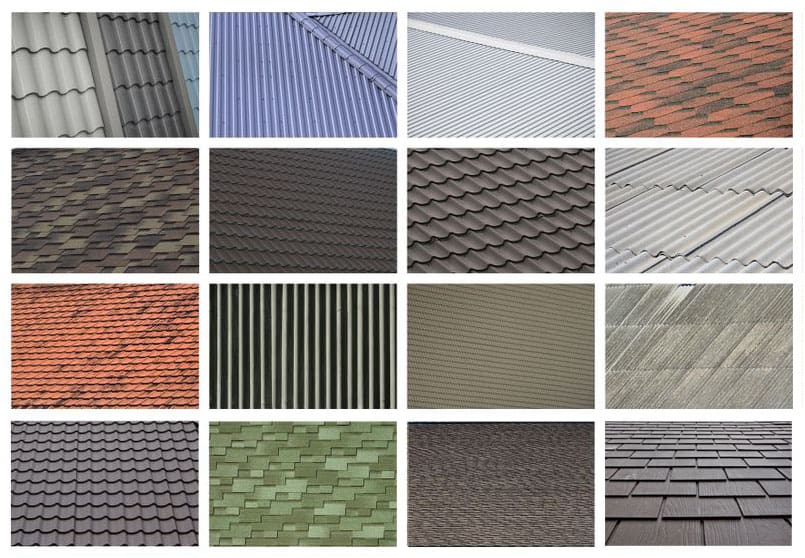
Also note that there are different roof structures and types. The most common roofing sheet types are: solar tiles, asphalt shingles, metal roof, tile roof, stone-coated steel, slate roof, etc.
Some roof types require the use of flashed anchors to secure the panels into the roof sub-structure or the roof decking. Others might require the use of standing seam metal roof clamps.
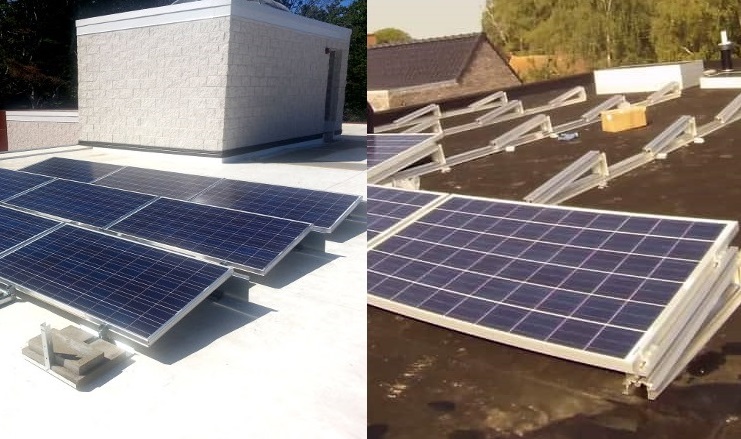
Ballasted blocks can also be used to secure the solar panels, as applied in most flat roofs. This is to help the solar panels withstand site winds. But the racking adds additional roof dead loading and possible snow-drift loading. Make sure a structural engineer reviews the effect of using the ballasted racking on your roof before you implement it.
The image below shows the various popular roof pan types and structures.
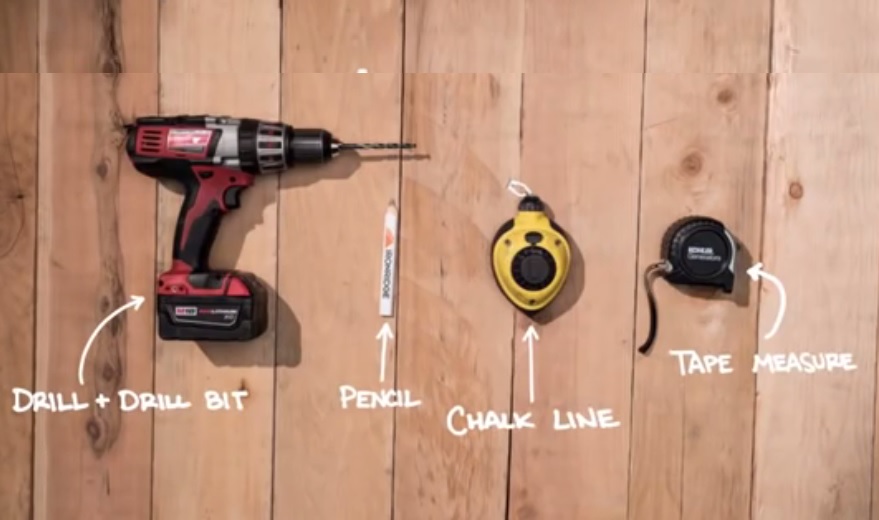
Some of the basic tools you will need for mounting solar panels on roof tops include:
- Drill and drill bit
- Chalk line
- Measuring tape
- Pencil
- Ladder, etc.
Some other tools and equipment you might need include: ladder, ratchet + socket and flat bar.
Other needed tools will come with your solar panel package.
Below are the steps for mounting solar panels on any type of roof:
Take all the tools and materials you will be needing, including the solar panels, rails, flashings, stanchions, bolts and nuts, etc. This is to ensure that there would not be any need to come down once you climb to the top of the roof for the work. You can first take these tools and materials up to the roof before you finally climb up.
Measure the distance between the holes that are pre-drilled on your panels. This will determine the distance between the rails.
Now mark out points on the roof pan, using the distance between the pre-drilled holes on the solar panel as guide. Try as much as possible to ensure that these points fall on top the rafters (if possible, at the centre of the roof trusts), so that the weight of the panel does not directly rest on the roof pan alone.
Drill a hole on the marked points. Make sure you mark out all the needed points before drilling holes on them. You can use your chalk line to make visible vertical and horizontal lines as guidelines. These holes are where you will fix your stanchions. Note that your stanchions help to hold the rails, where you will mount the solar panels. For each rail, you will need at least 2 stanchions.
NOTE: If you mistakenly drill a hole on the wrong point, you can use a standard sealant recommended by the manufacturers of your roof pans to fill the hole, so that your roof will remain water-tight.
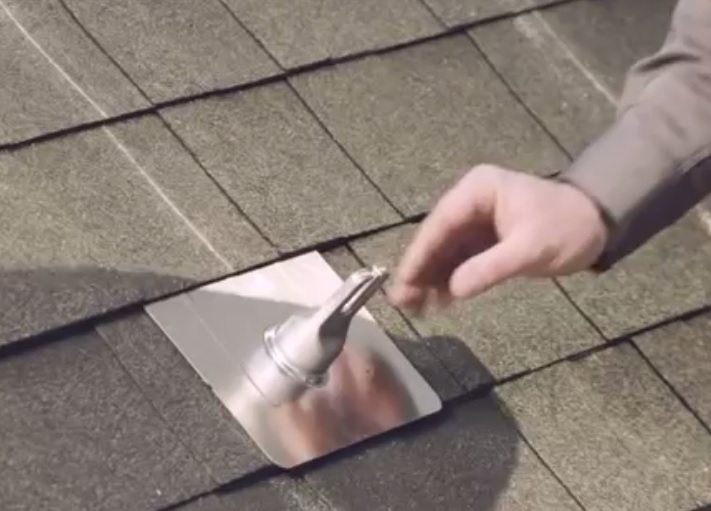
To ensure that the flashing has a good place to sit in the roof pan, you may need to use a flat bar to check if there is any nail that will obstruct the flashings from sitting properly (it all depends on your roof pan type). If there is any, remove them before fixing the flashings. You can then replace them afterwards (if need be) to keep the shingles in place.

Now slide in the flashings under the shingles, lag it down on top of the drilled holes and thread the bolt of the flashings in place. Then use ratchet + socket to tighten it up. Don’t over tighten to a point of concaving the flashings. Avoid using power tools for tightening the flashings as this can ruin the flashings or break the bolts.
Fix the cap of the flashings in place. This is where the rails sit.
Next, attach the rails to the flashings. If your flashings have caps, make sure that the rails properly sit on these caps. You might need to use a bolt to hold the rails in place. Check the elevation of the rails and make sure they are perfectly seated before tightening them to the flashings.

Connect the panels together to give you your desired effective voltage. Now connect the solar panels together; either in series, parallel or mixed (series-parallel). Before now, you should have done your calculations and known the connection type to use. Each solar panel has a power optimizer (micro inverter) usually installed underneath, with positive and negative terminal wires. The positive and negative wires can be easily locked together. But for positive-positive or negative-negative connection (in the case of parallel or mixed connection), you need to peel the wires and connect them manually, and then use a black tape to insulate the wires.
NOTE: Most solar array come with a bonded ground lug, which will be installed to any of the rails convenient to you, and then attached to a bare copper wire (at least 4mm diameter). This copper wire will then run to your earthing system. This makes the grounding of solar panels very easy.
Mount the solar panels on the rails. You can use clips (end and mid clips) or bolt to hold them in place. Make sure the power optimizers installed at the back each solar panel sits freely and is not pinched in any way.

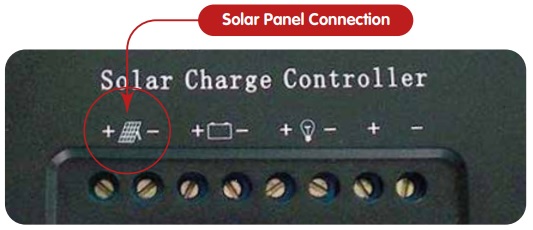
Now connect the output cable (positive and negative) of the solar panels to the solar panel terminals (positive and negative) on the charge controller.
Congrats! You have successfully mounted your solar arrays on your roof top and connected it to your charge controller.
See:
- How to Connect Solar Batteries & Panels to Charge Controller
- Solution to All Solar PV Systems Installation Calculations
Video of How to Mount Solar Panels on Rooftops
Step by Step Guide on How to Install Solar Arrays on Standalone Structures
- Measure the total area of all your solar panels (length x breadth). You can measure the area of one panel and then multiply by the number of solar panels that make up your array.
- Now look for a standalone ground solar mount that can fit your solar array in any solar shop. If you can’t find a ready-made standalone solar ground mount, look for an experienced welder to manually construct a standalone solar ground mount that will fit your solar array. The structure should be tilted a little (about 15 to 20 degrees from the vertical) so that the arrays can be exposed to more sunlight. The mount should also be raised a little from the ground. Make sure there are no external shading sources, like trees or buildings.
- To construct a fitting solar ground mount for you, the welder will need to know the total area of your solar array. Also, the he needs to know the distance between the pre-drilled holes on the frames of the panels, for fastening the solar panels to the standalone solar ground mount with the aid of bolts and nuts. He will also need to drill a hole on the frame of standalone structure, through which the bolts will pass from the pre-drilled hole on the solar panel frame to fasten the solar panels to the standalone structure. An accurate measurement is needed to ensure everything fits in perfectly.
- Once the ground mount is ready, mount it to the ground. Make sure that it is firmly mounted to the ground. You can dig about 1 foot hole, fix the legs of the standalone ground mount to the hole, and then use a mixture of sand, cement, gravel and water to fill the hole. This will ensure that it is firmly fixed to the ground.
- After the standalone structure has been fixed to the ground, use steel bolts and nuts (with washers) to fasten the solar panels to the standalone ground mount through the pre-drilled holes on the solar panel’s frames and the manually drilled hole on the frame of the standalone structure.
NOTE: To protect the solar panels from being easily unfastened from the standalone structure and stolen, you can use a welding machine to tack each bolt to its nut. This way, no thief can easily loose the solar panels from the standalone structure and steal it. This specially recommended if your area is insecure, or if your house is not fenced, with a gate. - Now connect the solar panels together; either in series, parallel or mixed (series-parallel). Before now, you should have done your calculations and known the connection type to use.
Now connect the solar array to your charge controller, which is usually kept indoors. Make sure you use the correct size of solar cable for this connection.
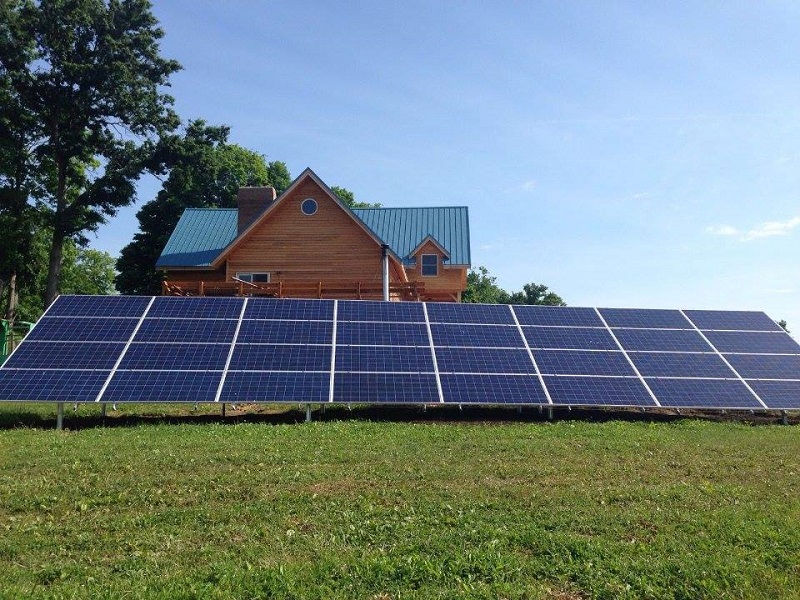
Below is a sample of a completely connected solar array, fastened to a ground standalone structure.


Conclusion
You have learnt how to mount solar panels to rooftops and standalone structures, possible solar array mounting locations and factors to consider before choosing a mounting location for your solar array. You also learnt how solar charge controllers work and the difference between MPPT and PWM charge controllers. Feel free to apply these tips when mounting your solar array.
Did you find any section of this article confusing? Ask your questions in the comment section below. Don’t forget to subscribe to this blog via email. Share this article with your social media friends by clicking a share button. Enjoy!